We’re all aware that we are on the age of AI and, whether we like it or not, it’s not going anywhere. That’s not a bad thing, though. This past couple of year’s hype cycle is finally slowing down. Instead of buzzwords and marketing mayhem, we’re left with genuinely useful tools, if you’re up for learning how to use them.
As a developer, I’m always curious about new stuff, but I’ll admit, I’ve been quick to judge. It happened to me with AI a couple of years ago, when it started my first thought was “man, this sucks. Auto-complete can’t even complete properly.” Don’t get me wrong, I’m not blindly trusting Copilot to write all my code. It’s not there yet. But I do rely on it to suggest optimizations or show me different ways to approach something.
So when I started poking around with MCPs (Model Control Protocols), I got pretty excited. Problem is, most of the guides are built for Cursor or Windsurf, sometimes Claude Desktop if you’re lucky. And I always wondered: why not VS Code? Most of these editors are just forks of it anyway. And VS Code is finally catching up, if not outpacing some of them.
Let’s also be real, when you’re just a dev trying things out or a really small team, price matters. Cursor starts at $20/month with ~225 Sonnet 4 requests. Windsurf is $15/month for 500 prompt credits. VS Code? Free. GitHub Copilot? $10/month with 300 Sonnet 4 requests plus unlimited regular request and code completions! if you're in a tight budget, there's a clear win here.
If you’re already using Cursor or Claude Desktop, Webflow has a guide for you. But if you’re sticking with VS Code (like I am), here’s how to get Webflow and other MCPs working inside your editor.
TL;DR
- You can run Webflow’s MCP in VS Code, even though it's not officially documented.
- All you need is GitHub Copilot and a quick config file.
- Save money, keep your setup, and still get the AI perks.
Why I think VS Code Still Slaps
VS Code might’ve lagged behind some of its forks for a minute, but that’s changed. It's fast, it’s well-supported, and you’ve got access to the same OpenAI models used in the more expensive tools. For individual devs, getting the same power at a lower cost lower cost. That’s a no-brainer.
Setting Up Your Workspace
If you don’t already have VS Code installed, grab it from here. Next, create a new folder anywhere in your workspace. Open VS Code, click “Open Folder”, and select the one you just made.

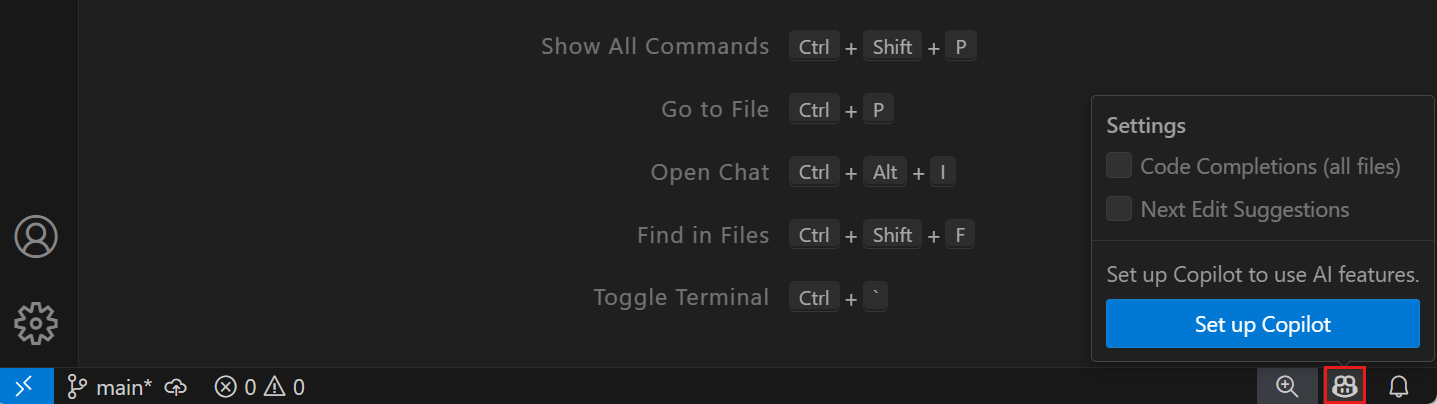
Once you open the folder you created you should be seeing something like this:

Now from here we’ll need to get our GitHub Copilot account connected, to do that hover over the Copilot icon in the Status Bar and select Set up Copilot.
Choose a sign-in method and follow the prompts. If you don't have a Copilot subscription yet, you'll be signed up for the Copilot Free plan.

Done, with this you are now able to use copilot in your workspace!
Installing Webflow’s MCP in VS Code
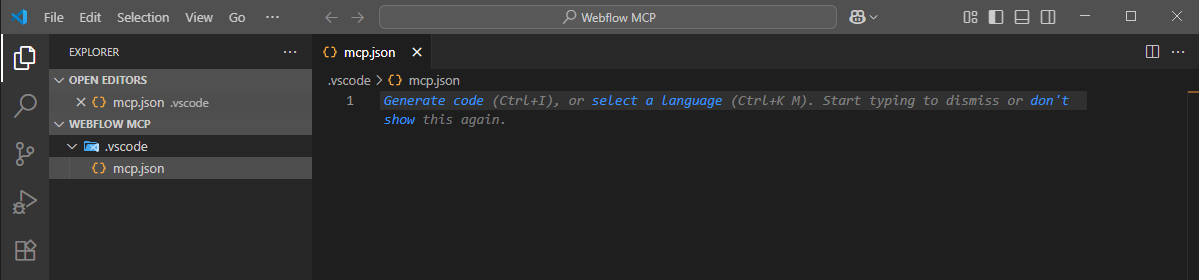
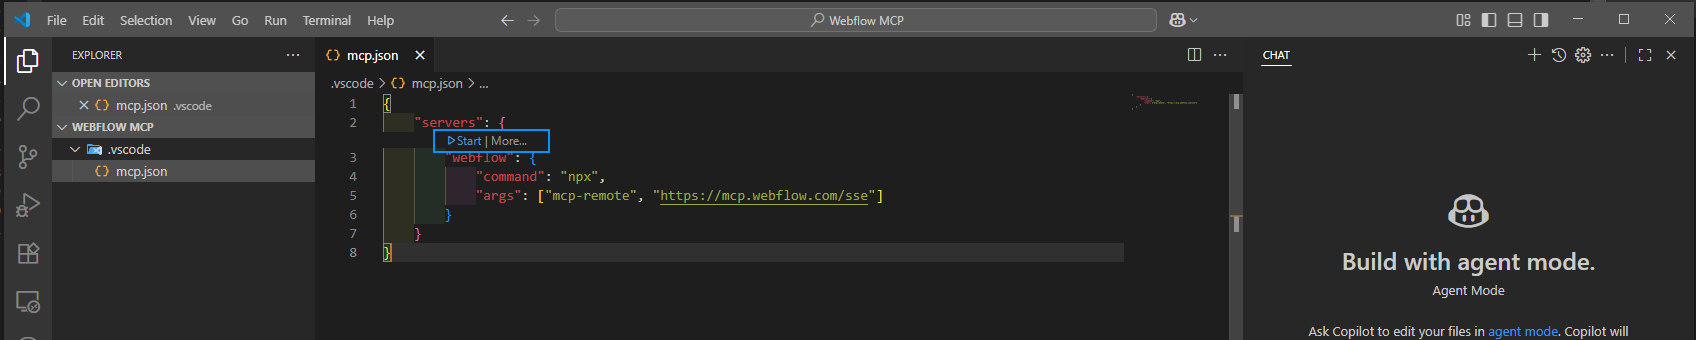
Now that we have a little agent that will be helping us work with our Webflow sites, we’ll need to give it the tools to actually do so! Let’s start by adding a new file in a new folder, the route will be this: .vscode/mcp.json, your workspace should look like this:
Then, paste in the config below. This follows Webflow’s MCP setup, but adapted for VS Code’s format:
//Webflow MCP installation on VS Code
{
	"servers": {
    	    "webflow": {
        	"command": "npx",
            "args": ["mcp-remote", "<https://mcp.webflow.com/sse>"]
        }
    }
}
Save the file (Ctrl + S / Cmd + S). and you should see a run prompt above your MCP server code, click on it and a browser window will open. Follow the prompts on it until the process states the MCP has successfully connected.
You should see a little Run option appear above the JSON block, click it. A browser window will pop up. Follow the steps until you see a message saying the MCP has successfully connected.
Using the MCP
Once it’s connected, you can start prompting Copilot to inspect your Webflow projects. You’ll be able to:
- Ask about structure or layout
- Review CMS data
- Explore component behavior
It’s still early days for MCP workflows, but you’ll start to see how powerful this setup can be.
That’s It!
If you made it this far, nice job. You’ve got Webflow’s MCP working in VS Code with no need to switch to Cursor or anything else. Start exploring what Copilot can do with that extra context and let it help you build smarter.