TL;DR
- In your applications, the control flow is the one in charge of making sure your code is taking the right path.
- if, else if, and else help run different code depending on conditions.
- You’ll usually combine control flow with comparison or logical operators (coming up in the next article!).
- Good control flow helps avoid messy, repetitive code.
Getting started
Writing code is basically telling the computer what to do, one step at a time. But what if you have to decide something based on the data that will change the steps that the computer needs to take? How do you tell the computer, ‘hey, when this happens, do this or that’? That is exactly where control flow comes into play. It makes sure your code is able to decide what to do based on certain conditions.
In this article, I’ll walk you through the most basic building blocks for making decisions in JavaScript: if, else if, and else.
💡Before we jump in, these statements work hand-in-hand with operators, like ==, >, or &&. If those look a little fuzzy or you are finding them hard to understand right now, don’t worry, we’re covering operators in the next article.
What Is Control Flow?
As I explained above, control flow is but a fancy term for how your code “flows” from one process to the next.
By default, JavaScript runs code from top to bottom, line by line, but using conditional statements, we can essentially interrupt, modify, and even reset that flow by tell our program :
- “If this is true, do this.”
- “Otherwise, maybe do that.”
- “If none, do this other thing instead.”
The if statement
The if statement is, pretty self explanatory IMO, is just stating IF something happens, then do something, look at it in this way:
if (condition) {
	// code to run if condition is true
}
Now let’s say we are trying to check IF someone passed their test, the minimum approving score is 70
let score = 90;

// Passes only if trictly greater than 70 (70 fails)
if (score > 69) {
	console.log("Not bad.");
}

// Passes if it is higher or equal to 70 (70 passes)
if (score >= 70) {
	console.log("Not bad.");
}
Here, JavaScript checks if score is larger than 70 it prints “Not bad.” If not, it skips it.
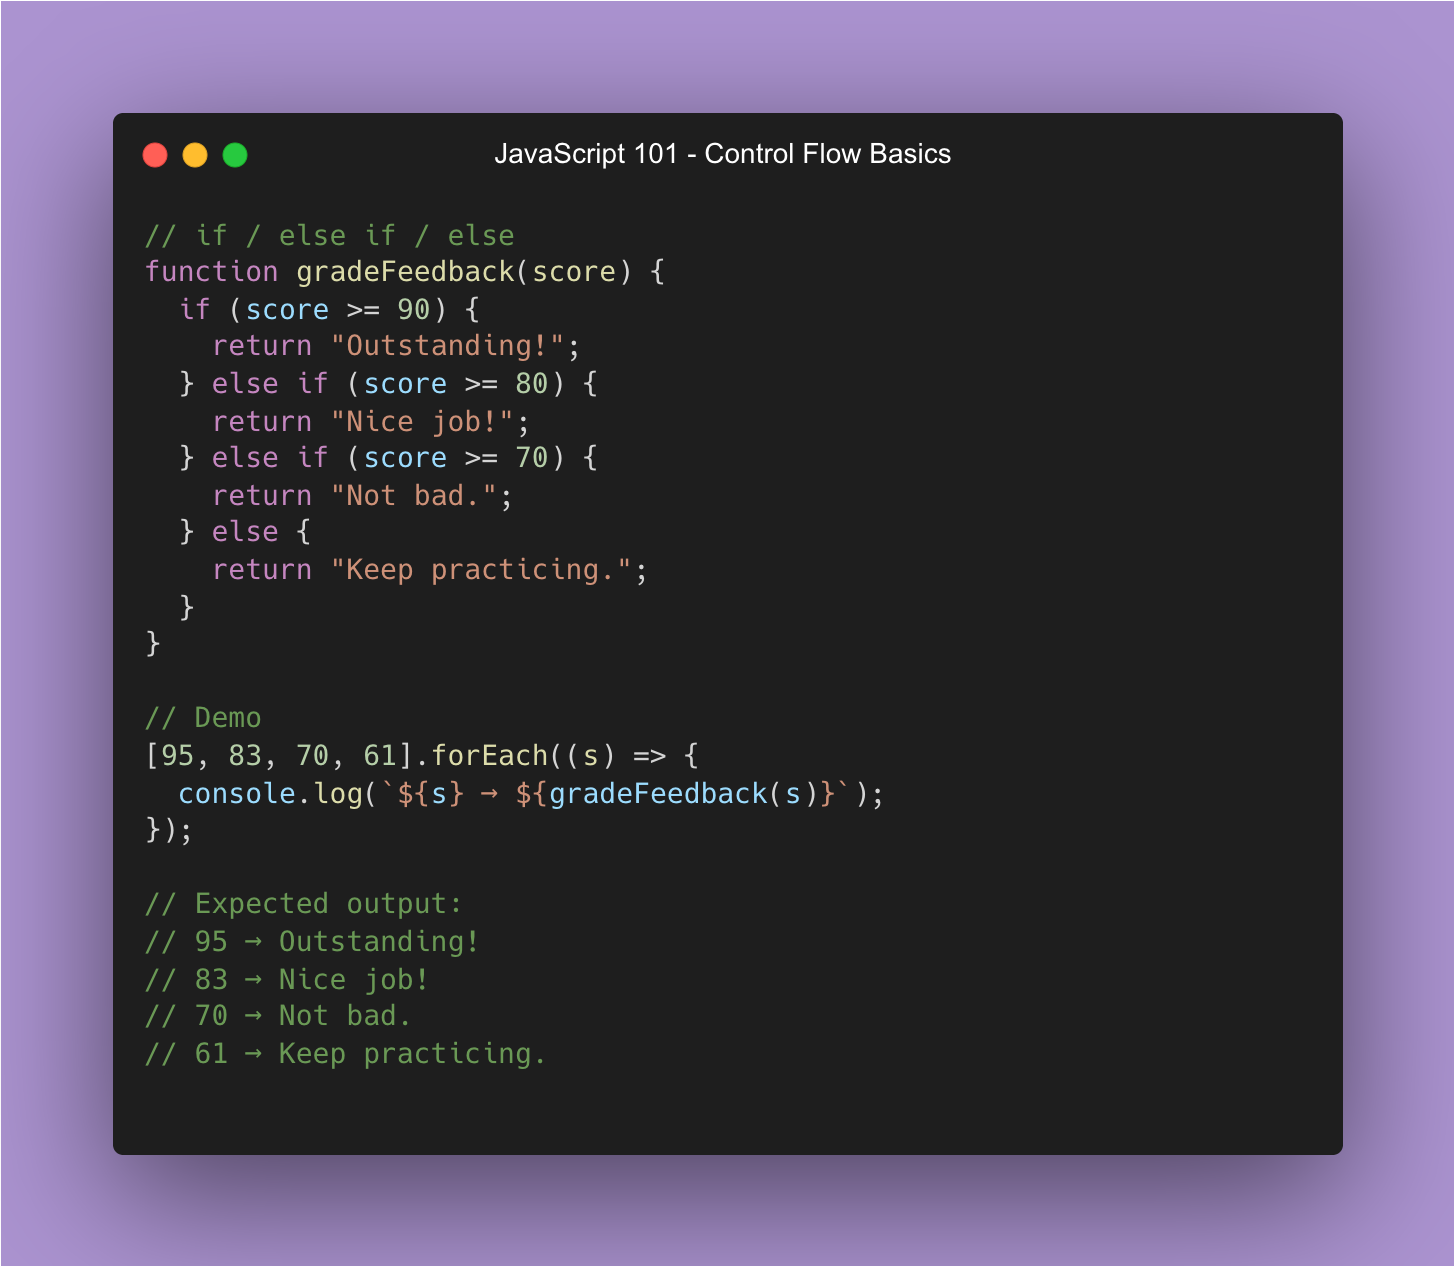
The else if and else statements
Now, what do we do when we need multiple conditions? As the title might suggest, we use the else if and else statements, which I believe to be pretty self-explanatory:
if (score > 80) {
	console.log("Nice job!");
} else if (score > 70) {
	console.log("Not bad.");
} else {
	console.log("Keep practicing.");
}
This lets your code pick between several paths, or a fallback if no path applies. JavaScript will stop checking once it finds a match.
Pro Tips to keep your conditions clean
- Keep conditions simple, if they get too messy, consider breaking them into variables.
- You CAN nest if statements, but this doesn’t mean you should. Having conditions going too deep makes your code hard to read and hard to understand.
- Always test all branches of your conditions.
Coming next: Operators in JavaScript
In the next part, we’ll dig into how JavaScript manages operators. We’ll then see how they pair with if, if else, and else to create proper data flows
Control Flows In a Nutshell